How to Fit and Finish a Gunstock
Basic Stock Fitting
First off, I DO NOT FIT OR FINISH GUNSTOCKS.
I have always tried to be honest with questions from potential customers that call, wondering just what a 90% inlet and profiled stock is. The trend in marketing gunstocks might lead you to believe that buying a "drop-in fit" or 95% inlet, or even 98% inlet stock is a miracle shortcut to that custom rifle, all you need is a screwdriver and a can of OL Blighty Safari Finish. If that be your cup of tea, please read no further, I do not offer that easy of a solution, you will not be satisfied with a Treebone stock.
For those willing to trade a minimum of 20 hours of work for a lifetime of pride, read on...
PATIENCE is key. The reward is looking forward to handing your finished project to friends with pride. The time you spend will be forgotten, the satisfaction lasts a lifetime.
One of the most common questions I deal with is “how difficult is it to fit a stock, what tools do I need?” A darn good question, and I don't think it can be given a decent shot answering this question on the phone, thus these pages are being offered. It seems to me it would be like explaining how to be a carpenter or how to play a musical instrument by phone or email.
Stock fitting isn’t for everybody, I would rather not sell a stock if the customer is not up to the job or aware of the work involved. By the time you go through this, you should have a good idea if you want to try it.
There have been a couple of major books on stock making written in the past, some no longer in print, and generally difficult to find. Truly the best way to learn is to apprentice to a good stock maker, the chances of that are slim.
I learned what I know about wood from my Dad, who also taught me to carve. Fitting and finishing I learned by trial and error, self-taught so to speak. I would have been way ahead of the game had I gone to a good gunsmithing school or served an apprenticeship, but that was not to be.
What I am going to cover in this subject is how I get the job done. The purpose is to give my customers a general idea how to tackle the project themselves as simply as possible.
The “disclaimer” is this: This is intended for someone without any experience in fitting a stock. I am not intending to say this is the best method, or better than what you may be used to doing, it is only offered to help those without the benefit of previous experience.
My methods are not the best. I am not a high dollar, Guild quality stocker. My work is not perfect, there is much room for improvement. Hopefully someone will come forth and give a presentation on the best way to go about this. Until that time, I offer this.
I will use as an example a modern lever action rifle, a Marlin 336 Cowboy, .38-55.
I have stocked this gun several times, and they keep finding homes on someone else's guns. The methods will be pretty much the same with other makes and models.
I really prefer shotgun style buttstocks on my guns, but I sell a few Crescent Cowboy conversions to shooters that want that style. With that in mind, our subject will be to stock the 336 with a crescent buttstock and slim forearm in a Extra Fancy grade walnut. Most customers want a stock that appears traditional, in that case,a good 1/4 sawn select standard American Walnut would serve well, stained dark and finished with a low luster Tung oil or Phenolic Resin (that’s Spar Varnish with an attitude)
For this project I am using Fancy walnut as the finished product will be a sales tool.
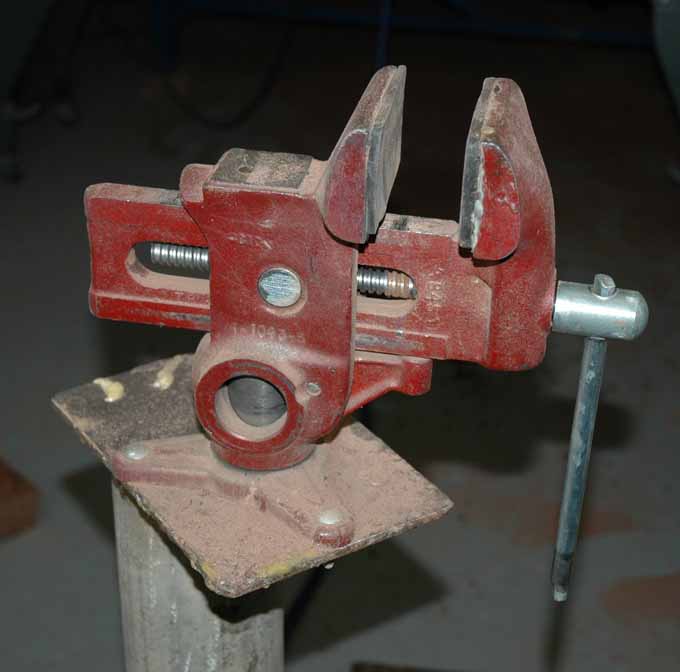
The Vise
Most any vise can be made to serve, it is a critical tool. The better the setup, the easier the job will be.
If you don’t have one of these, or something similar, save your money and get one! This is a tool that I cannot work without, I consider this to be the most important tool for this project. This is the old standby Versa-Vise, no longer made, unfortunately. Brownells Inc. carries an improved version, for about 220. Bucks, give or take. The Chinese have come out with a cheaper version for about 50 bucks, called the Parrot Vise, available from Grizzly Tools and some well stocked tool stores.
If you plan on using one for any length of time and expect it to last, go with the Brownells version.
I epoxied neoprene rubber to the jaws and mounted it to the floor on a pipe base so I can swing 360 degrees. I actually use 2 of these, but I could get by with one in a pinch.
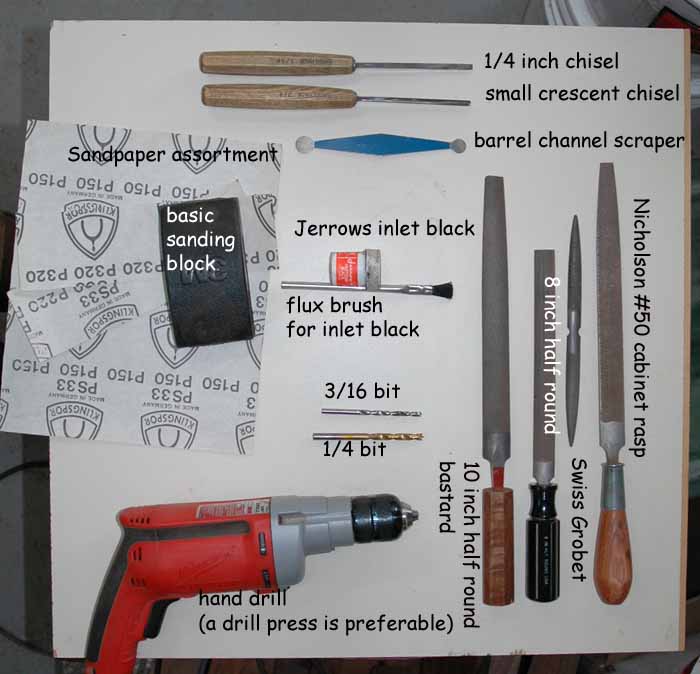
Basic hand tools for this job
Pretty simple, eh? You might ask, Where is the Dremel tool? If you are lucky, the neighbor borrowed it and didn’t return it. I didn't show a few items I use like the straight edge rule, mill file for metal work. The point is, keep it simple.
Planning the job
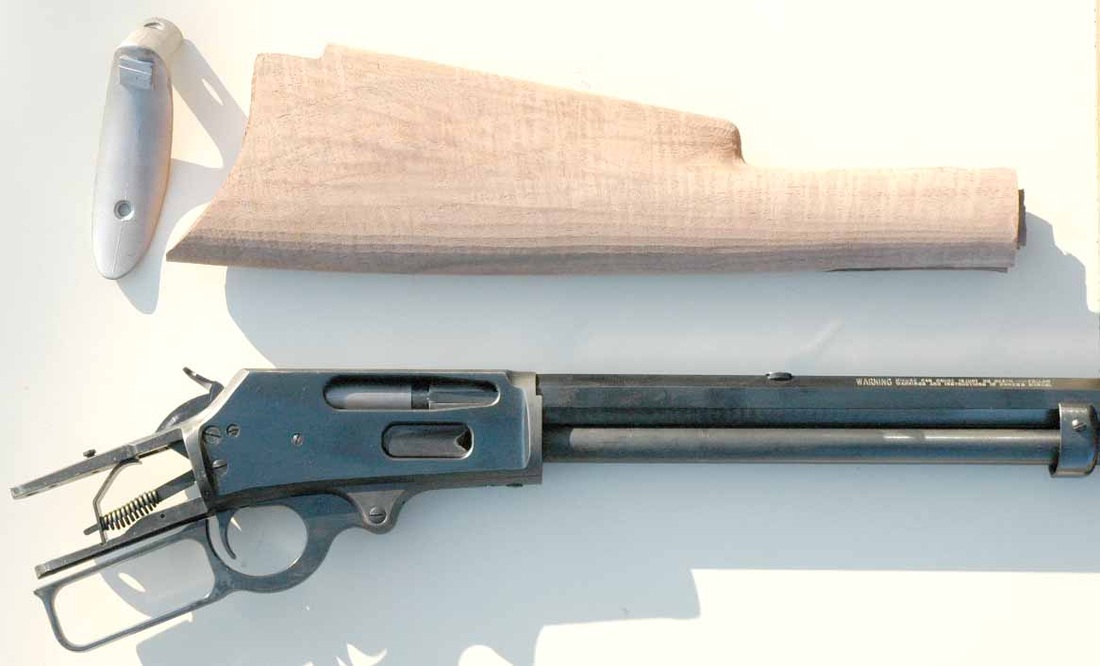
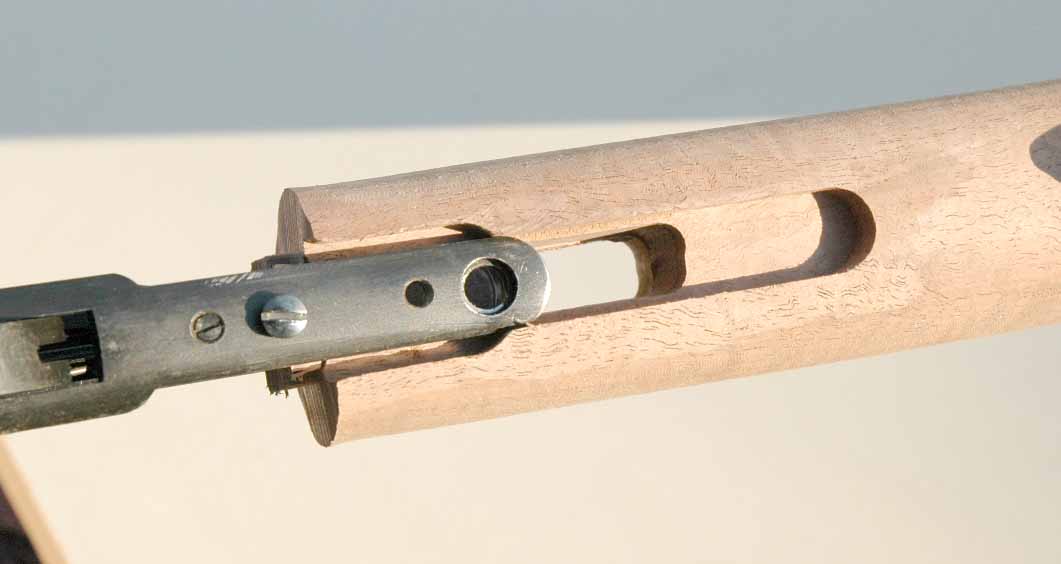
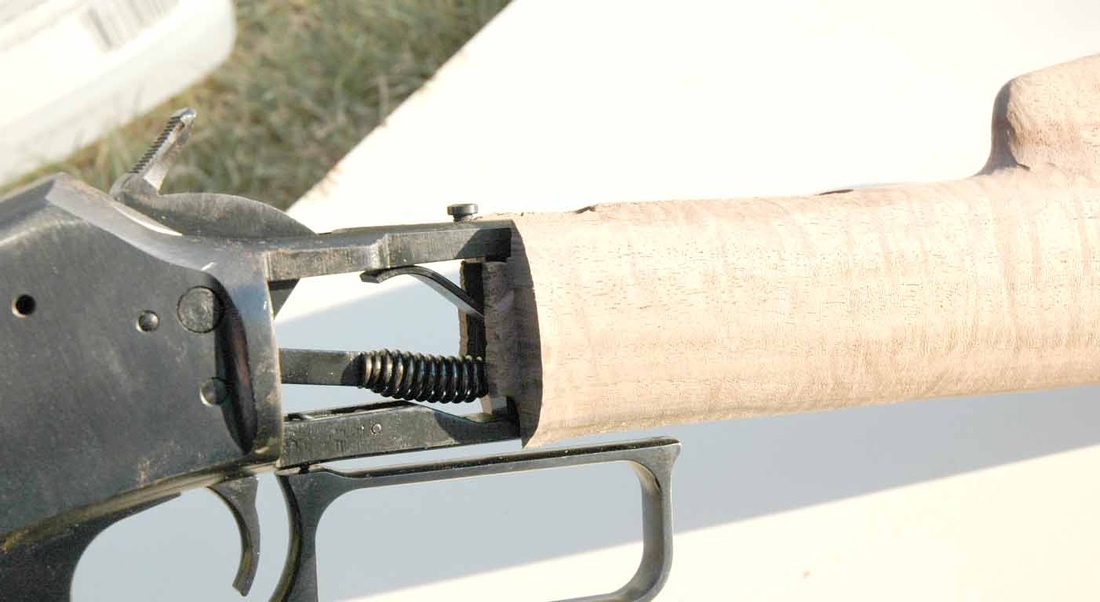
OK, you received the stock and the rifle is stripped down. First let’s check to see what needs to be done. The stock is undersize for the tangs, as you can see, this is how far the tangs slip into the stock before fitting.
DO NOT attempt to give it a good tap to help things along, the result is a split stock! As you can see the tang mortise on the stock is cut full depth, but the sides of the mortise are narrow, this is where the majority of the work will be done, and a sloppy job will be quite easy to see.
DO NOT attempt to give it a good tap to help things along, the result is a split stock! As you can see the tang mortise on the stock is cut full depth, but the sides of the mortise are narrow, this is where the majority of the work will be done, and a sloppy job will be quite easy to see.
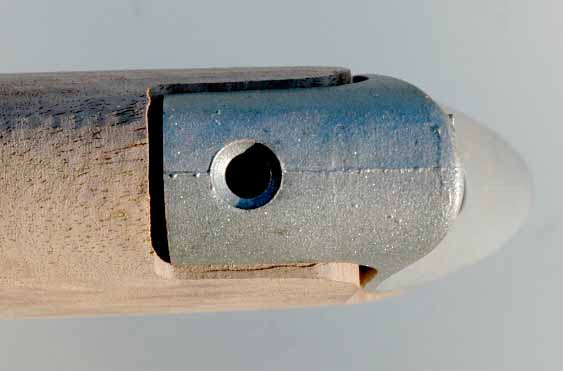
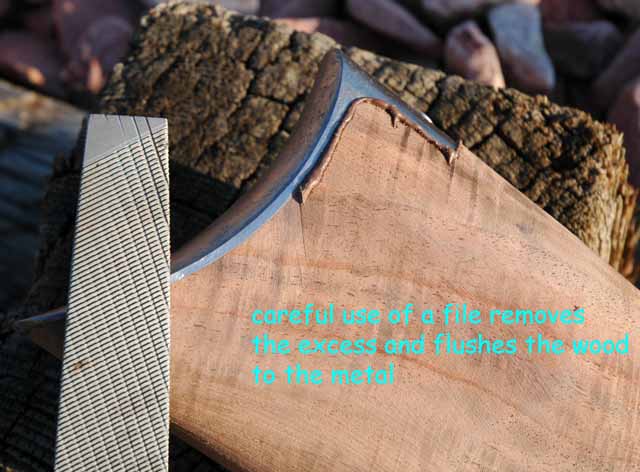
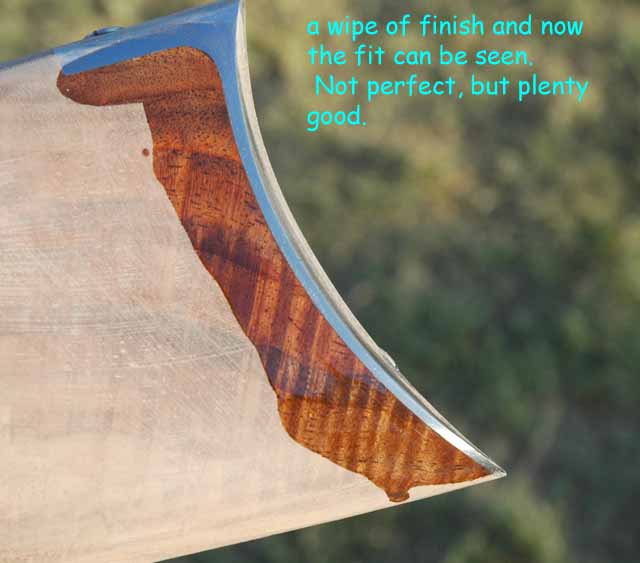
The next picture shows the buttplate setting on the buttplate inlet. Note the wood is wider than the plate. The same will be seen on the wrist of the stock when it is inlet up to the receiver. Not to worry, I have heard customers say “Gee that sure is a lot of sanding!” No kidding! That is what the files are for. Sanding that much wood is like bailing out a bathtub full of water with a teaspoon. I’d rather use a bucket, or in this case a file.
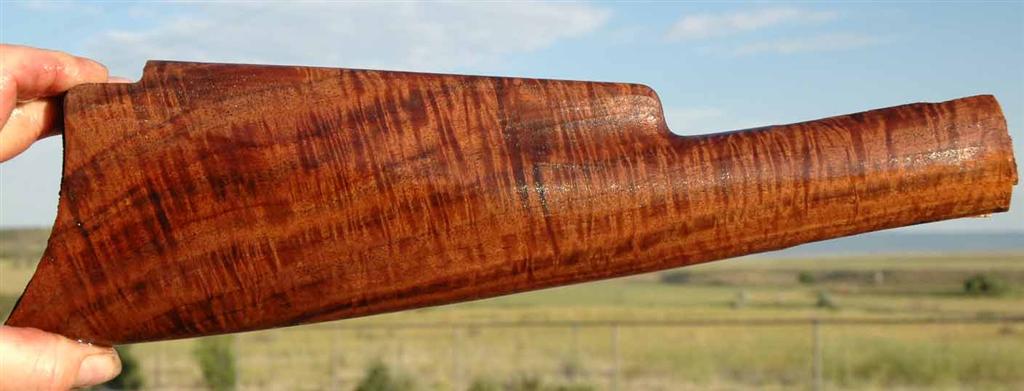
IF you are like me, you just can’t wait to see the finished stock. In this case it is a fairly expensive piece of extra fancy walnut and it doesn’t look like much out of the box. Don’t go grabbing a wet rag just yet, lets try a better way to satisfy the old curiosity. Water just causes problems that aren’t needed, and a splash of mineral spirits or lacquer thinner does just as well to see what we have without harming the wood. Now that we have satisfied that urge, we can see that there is a fantastic stock waiting for patient efforts to bring it to life. Keep in mind that this is not a standard grade piece of wood, so don’t expect to get something of this caliber unless you order extra fancy. This stock was in inventory in that grade, so when you fork out the bucks for something special, you can get some pretty nice wood (in this case a buttstock and matching forearm with buttplate and shipping would cost 450.) The forearm is not shown, we will get to that in due course.
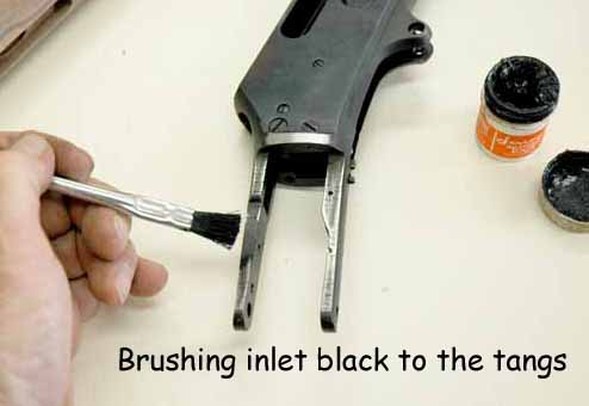
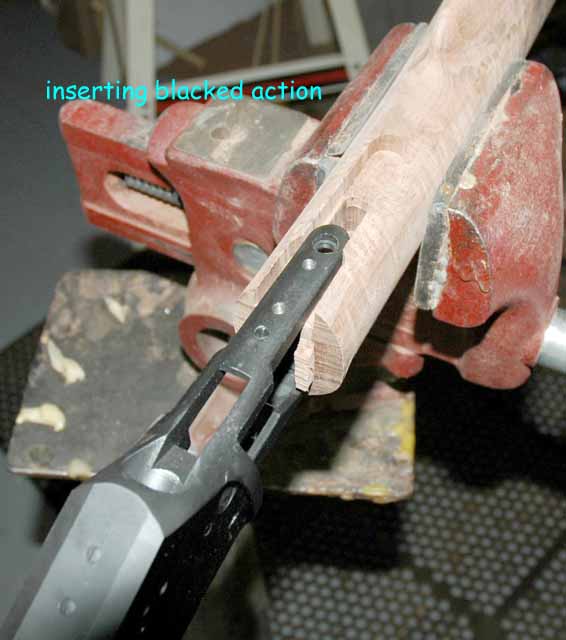
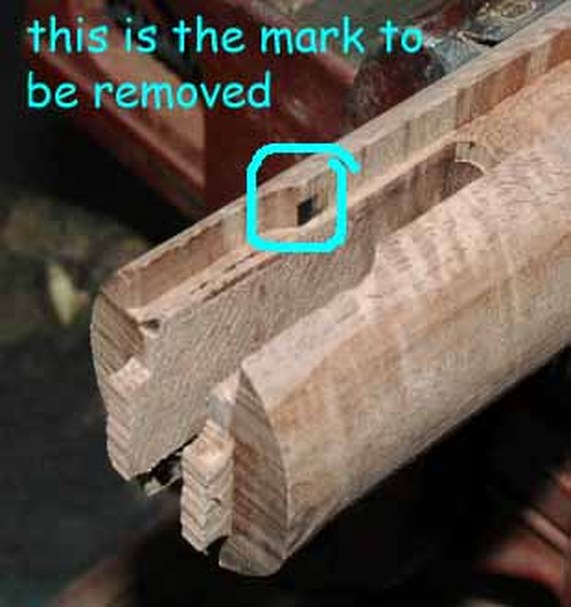
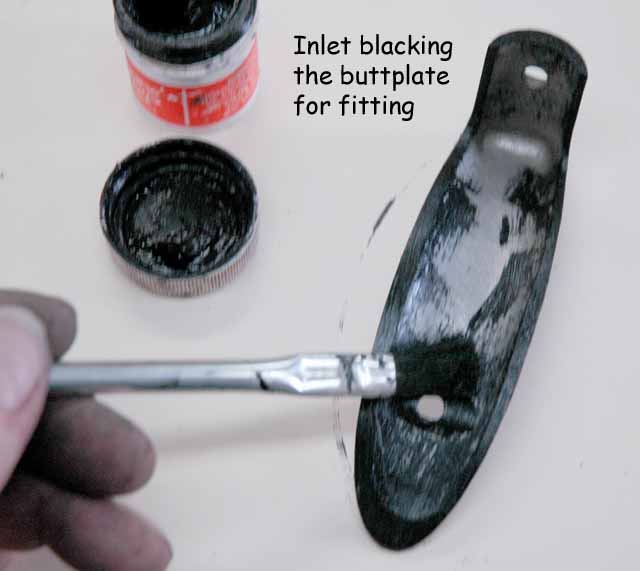
Inlet black is brushed onto the action anywhere it will contact wood. This stuff is going to get on everything so dress accordingly. It is fairly easy to wash off fortunately. This will tell us where the wood is tight and needs relief. Some thought is required, just because it makes a mark does not mean it requires removal, all we want to take off is whatever is stopping progress. Remove AS LITTLE AS POSSIBLE between the tangs. Ignore this advise and you will have an expensive TEETER-TOTTER.
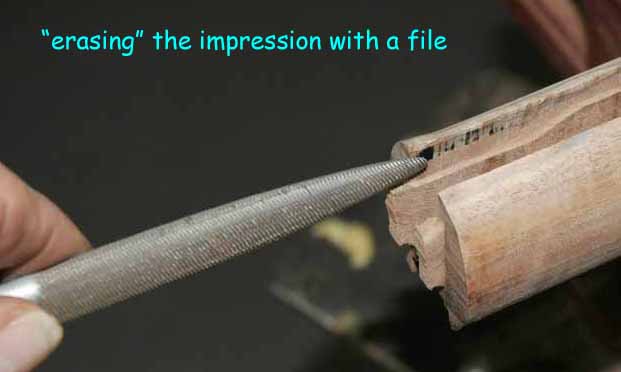
DO NOT try to inlet one tang at a time, keep them assembled while inletting. As shown, I use a file to "erase" the marks in the tight areas. If you erase more than the black spot, you will most likely end up with a gap. This will take about 2 hours of patient work to seat the action. I find that I can only work on this for 20 minutes at a time, then I go do something else for awhile and come back to it. If I work longer than that I tend to get sloppy.
DO NOT try to inlet one tang at a time, keep them assembled while inletting. As shown, I use a file to "erase" the marks in the tight areas. If you erase more than the black spot, you will most likely end up with a gap. This will take about 2 hours of patient work to seat the action. I find that I can only work on this for 20 minutes at a time, then I go do something else for awhile and come back to it. If I work longer than that I tend to get sloppy.
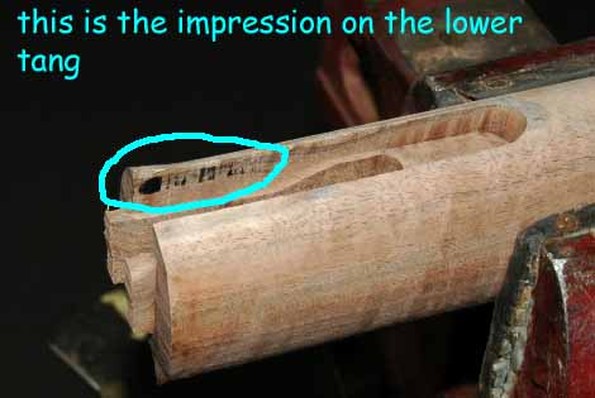
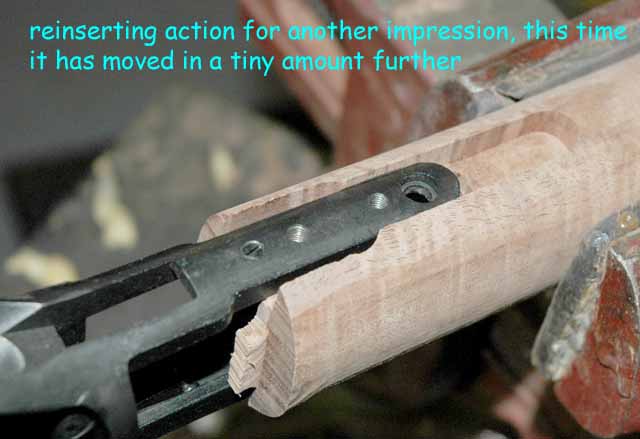
With the inlet black applied, start it into the stock, DO NOT FORCE IT, just press it into place firmly enough to leave an impression.
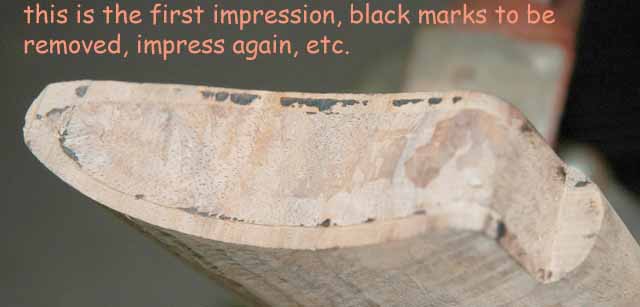
Using a file helps to keep a flat surface. Some use scrapers. To avoid gaps, only file off the mark. Turn the stock over in the vise and repeat on the other tang mortise. This is slow going, but patience will be rewarded. NOTE, if you continue to erase spots as they appear, a gap will be the result. We are trying to relieve the wood that is stopping progress. We want the wood to be in contact with the metal, but not too tight. We will also be looking for shiney reflection in the black, where the metal is compressing black into the wood. That is a good spot to scrape carefully.
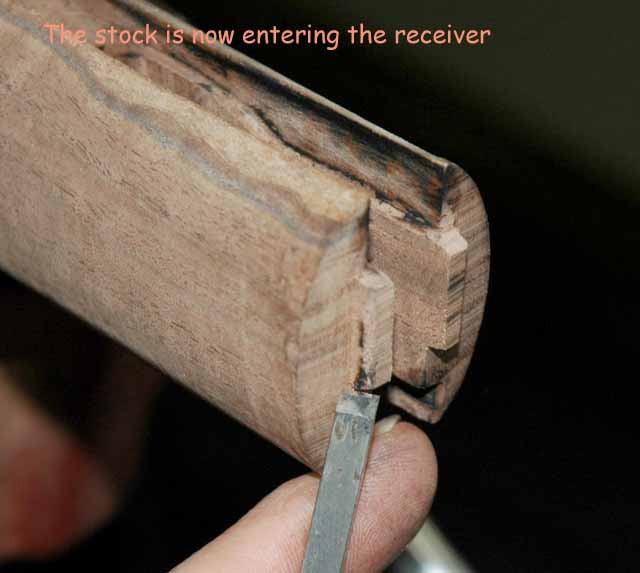
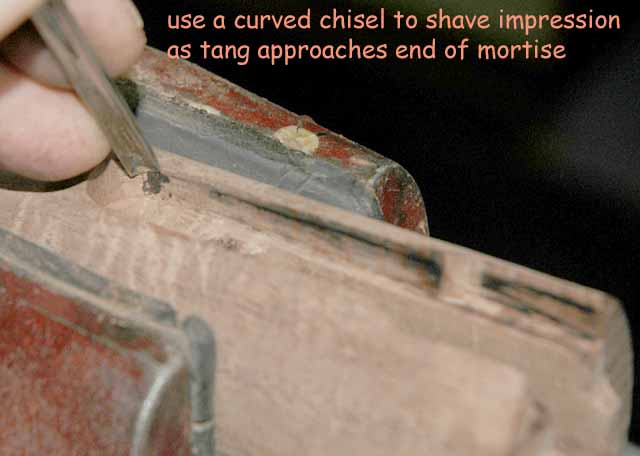
I use a razor sharp chisel to remove marks where the file won't work well. Note the size of the shaving! It has taken a good half hour to get this far back, and I have taken 2 breaks. DO NOT rush, and walk away if you get frustrated.
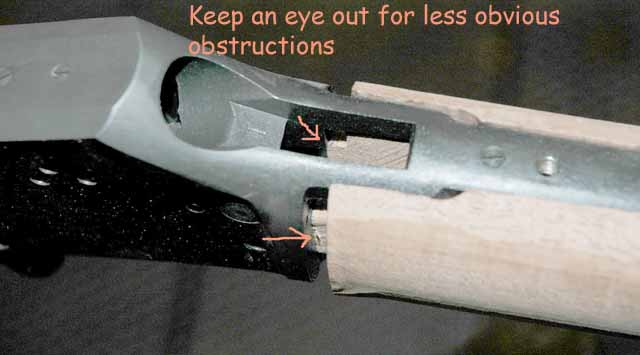
As a couple hours go by and we are concentrating on the tang mortises, it is easy to miss less obvious obstructions. In this case the action has come in contact with the two ears on the front of the wrist. If you have applied inlet black properly, you will now see new marks appearing.
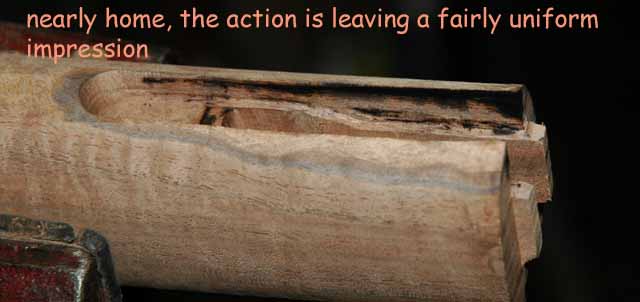
I apologize for not including some important pictures at this point, as the last bit of contact at the ends of the tang and the end of the stock at the receiver are quite important. You will want to be extra patient making these end fittings, getting as full a contact as possible. Ideally, the entire surface should be solid black from perfect contact, something I have never been able to achieve. I have to be satisfied with good contact on the exposed edges, and glass bed the remaining.
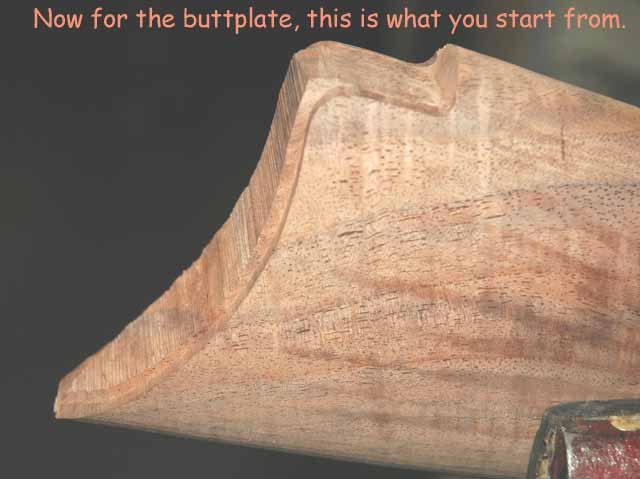
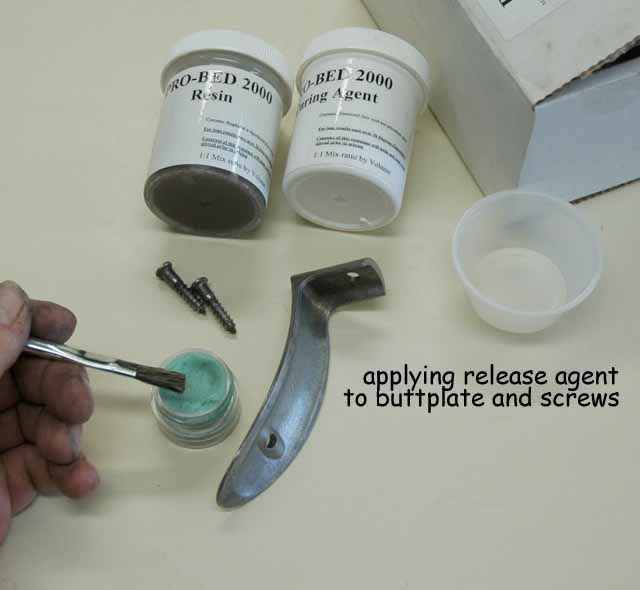
The buttplate inlet is carved pretty accurately for the buttplate. Be vary careful not to damage this machined surface when removing the excess wood in the interior.
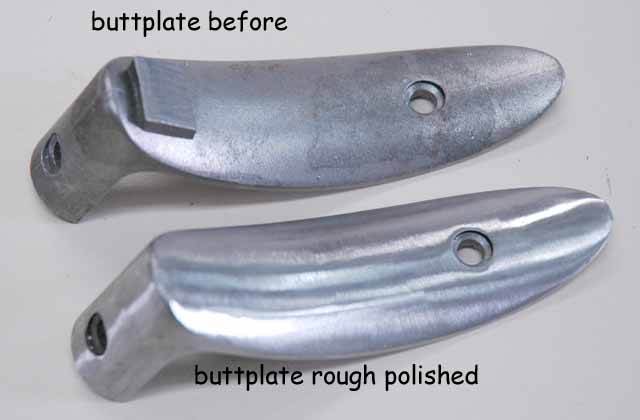
I used a bench grinder to remove the "gate" (injection point in the casting process, similar to a sprue on a cast bullet) and a small belt sander to rough polish the plate. I have done a number of these with a mill file, and so can you, it just takes more elbow grease.
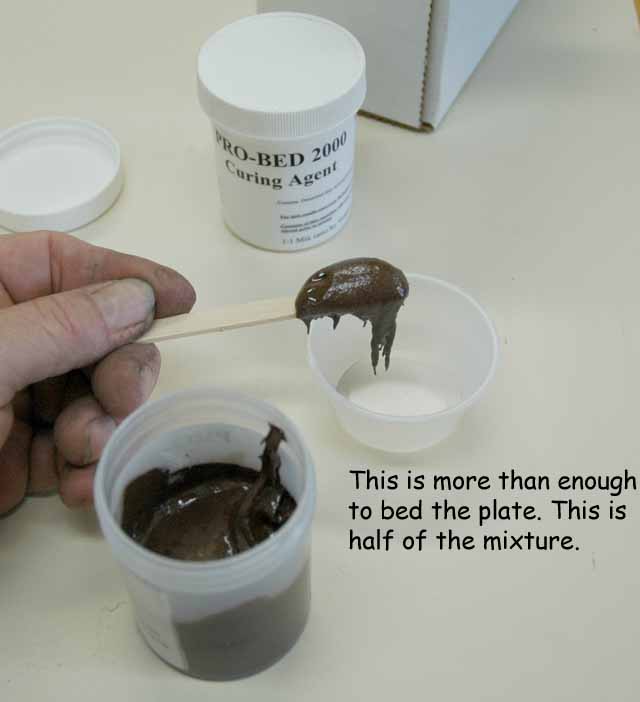
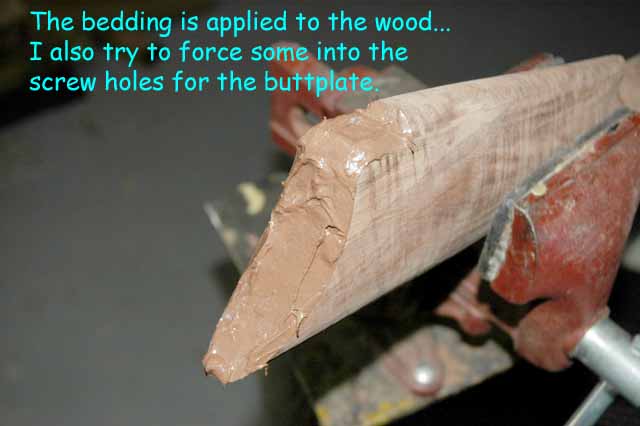
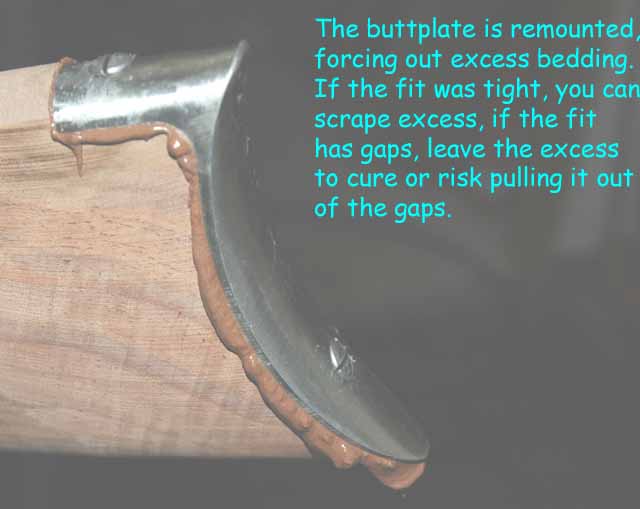
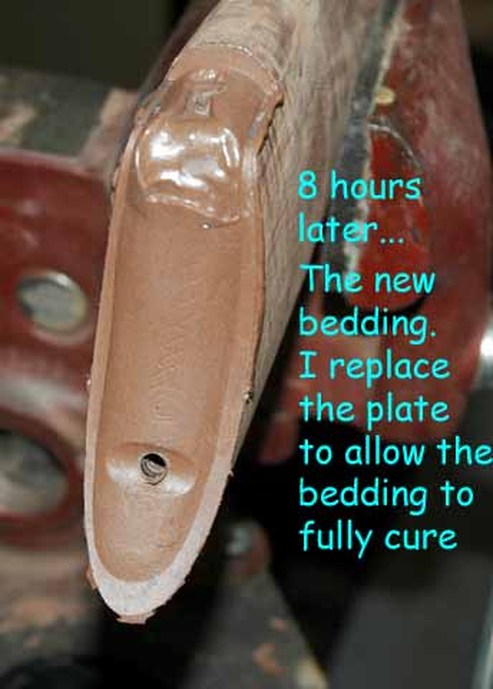
A pocket of air developed in the corner of the buttplate bedding. Since the entire edge of the plate is filled, I am not concerned. The benefit here is the added strength to the stock. It is not uncommon to see the wood break off at the toe on older guns. Bedding goes a long way to prevent this. Also since most guns are stored upright, moisture can find its way into the stock, turning the wood black and weakening it. The bedding is an excellent sealer.
